Image to Minecraft Skin: What Actually Works
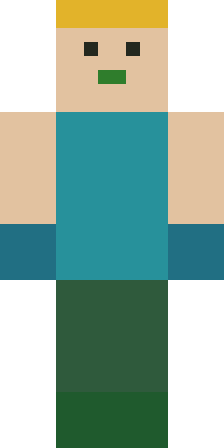
Turning an image into a minecraft skin does not mean pasting a photo onto your character — a skin is a 64×64 template with a fixed layout, and a photo knows nothing about that. What “image to skin” really means is fitting the parts of an image you want onto the right rectangles of the template, either by hand or with a converter that does a rough job automatically. Set your expectations correctly and you will be much happier with the result.
The honest limits
The head front is 8×8 pixels. That is not a typo — the entire face of your character is 64 pixels total. A detailed selfie simply cannot survive being shrunk that far; it becomes a smudge of a few colours. This is the thing converter sites rarely tell you. The images that translate well are simple, high-contrast and already a bit graphic: a logo, a bold outfit, a cartoon face, a single dominant colour. A busy photograph does not.
Method 1: use the image as a reference
The method that gives the best result is also the least automatic: open your image beside the 64×64 template and hand-paint the parts that matter, using the image only for colours and shapes. Pull the three or four dominant colours from the outfit, block them onto the chest and legs, then spend your effort on the 8×8 face, because that is what people actually look at. Twenty minutes of this beats any one-click conversion.
Method 2: converter tools
Image-to-skin converters take your picture, downscale it, and slap regions onto the template automatically. They are fast and fine for a laugh, but they treat the flat image as if it were already a UV layout, so arms and legs usually come out as meaningless slices of the photo. Treat a converter’s output as a starting point, then fix the face and limbs by hand. If a converter asks you to sign in with your Microsoft account, close the tab — no legitimate converter needs your game login.
A note on AI converters
AI image-to-skin tools have become common and are better than the old crop-and-scale converters at guessing a front, back and sides from one photo. They are still guessing, though — the back of your character is invented, and fine detail is smoothed away by the 64×64 ceiling. They are a genuinely useful first draft; they are not a finished skin. Whatever tool you use, export a real 64×64 PNG and check it in a preview before committing.
Once you have a PNG you are happy with, apply it using how to change your minecraft skin. If your converted file behaves oddly — white boxes, wrong size — the reasons are all in the skin file format guide.
The face is only 8×8 — plan around it
It is worth repeating because it changes everything: the front of your character’s face is an 8×8-pixel square. That is 64 pixels to convey a whole face. No amount of clever conversion escapes that ceiling, so the winning move is to stop thinking like a photographer and start thinking like a pixel artist. Two dots for eyes, a line for a mouth, a band of colour for hair — that reads as a face at game size far better than a shrunken photograph, which just becomes muddy noise.
A quick manual workflow
- Open the image at a small size next to your template so you can eyedrop colours from it.
- Block the body and legs with the outfit’s two or three main colours — flat fills first, shading later.
- Draw the face by hand on the 8×8 front, keeping it simple and symmetrical.
- Add depth with one darker and one lighter shade of each colour, a pixel here and there — not a gradient.
- Preview on the model, fix the arms and back, then export a 64×64 PNG.
Colours: pull a small palette
Real photos contain hundreds of subtly different colours; a good skin uses a handful. Before you start, decide on maybe five or six colours from the source image and stick to them — a base, a shadow and a highlight for each material. This restraint is what makes hand-made skins look crisp while auto-converted ones look smeared. If you take one idea from this guide, let it be that a tight palette beats a faithful copy every time.
Staying safe with converter sites
A plain image-to-skin converter only needs your picture, so anything asking for a Minecraft or Microsoft login is a red flag — close it. Be wary too of converters that push a download or an installer rather than simply giving you a PNG; a skin is just an image, and you should be able to save it directly. Stick to tools that take an image in and hand a PNG back, and you avoid the whole ecosystem of account-phishing pages that cluster around popular skin searches.
Set expectations, enjoy the result
The people who are happiest with image-to-skin results are the ones who went in expecting a stylised, pixel-art impression of their image rather than a photo wrapped around a character. That is not a limitation to resent; it is the whole charm of Minecraft’s look. A simplified version of a favourite outfit, mascot or colour scheme reads instantly at game size, where a faithful photo would just be mush. Aim for recognisable, not realistic, and a converter or a quick hand-paint will give you something you actually want to wear.
A good final routine is to run the image through a converter for a fast base, then spend ten minutes cleaning up the face and arms by hand, and finish by checking it on both a light and a dark background so stray semi-transparent pixels show up. Export at 64×64, keep a copy for your backup folder, and apply it like any other skin. The blend of automation for the boring parts and a human touch on the face is what separates a skin that looks deliberate from one that looks like a scrambled screenshot.
Before you commit a converted skin, judge it at the size it will actually appear, not zoomed in. Shrink the preview down to a couple of centimetres on screen and squint — if you can still tell what it is meant to be, it will read in game; if it turns to mush, simplify further. The eye is a better judge than the source photo here. A skin that looks a little plain up close but crisp at a distance beats a busy one that only works under a magnifier, because a distance is where other players will always see you.
Image-to-skin questions
Can I turn any photo into a minecraft skin?
Technically yes, but a detailed photo shrinks to an 8×8 face and looks like a smudge. Simple, high-contrast images convert far better than busy photographs.
Are image-to-skin converters safe?
The image-only ones are generally fine. Never use a tool that asks you to log in with your Microsoft or Minecraft account — a converter only needs your picture, not your credentials.
What size should the final file be?
A 64×64 PNG. Some converters output larger HD images that vanilla Minecraft cannot display, so resize to 64×64 before uploading.
New to this? Start with the full walkthrough: how to change your minecraft skin.